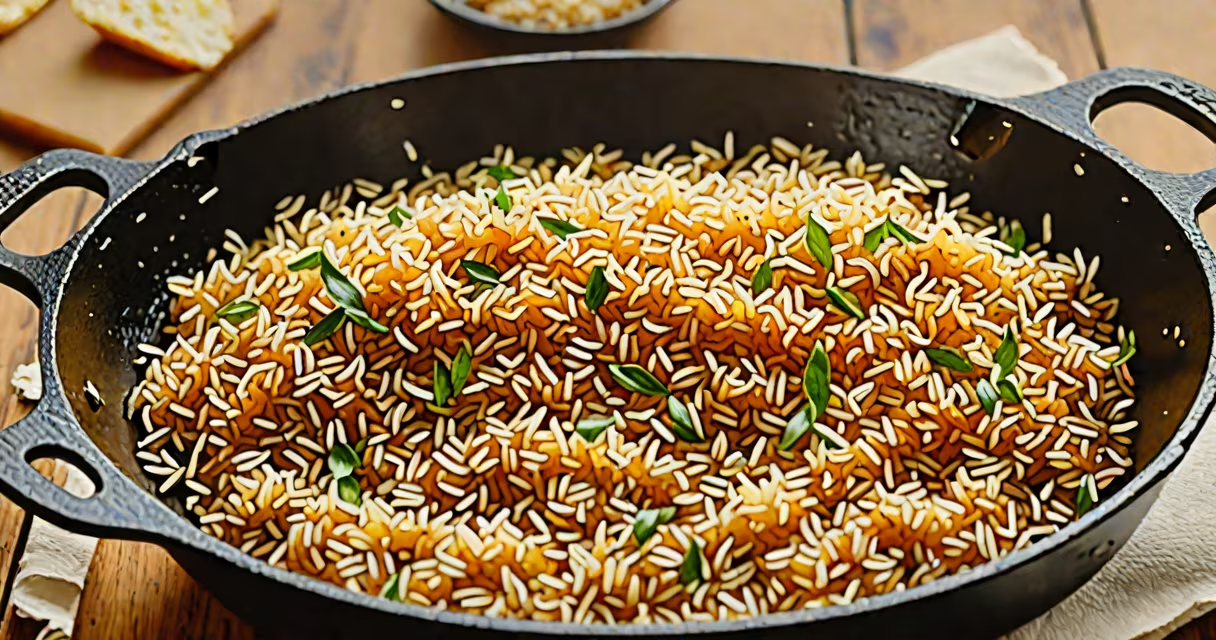
Crispy rice is cooked rice that develops a golden, shatteringly crisp exterior while maintaining a tender, fluffy interior. The texture forms through high-heat drying and fat-based browning, typically using oil or butter in a pan. This method transforms leftover rice into a crunchy base for dishes like okonomiyaki or as a standalone snack.
The foundation of crispy rice lies in moisture reduction and surface contact with fat. When rice is heated above 160°C (320°F) in oil, water evaporates rapidly, and Maillard reactions create a complex, nutty flavor and crisp crust. A single layer of rice spread thin in a hot pan ensures even browning without steaming. Using short-grain rice like Japanese uruchimai enhances crispness due to higher amylopectin content, which gelatinizes and reforms into a firm, brittle structure upon drying.
For optimal results, start with cooled rice-ideally refrigerated overnight. Freshly cooked rice contains too much moisture, leading to soggy or steamed results. The ideal rice-to-oil ratio is 1 cup rice to 1.5 tablespoons oil. Too little oil causes sticking; too much leads to greasy texture. Heat the pan to medium-high before adding rice. Stir continuously for 3-5 minutes until the edges turn amber and the rice begins to crackle.
Crispy rice relies on three core components: rice, fat, and heat. Choose short-grain white rice-specifically Japanese-style uruchimai-for maximum crispness. Long-grain varieties like basmati or jasmine lack sufficient starch to form a stable crunch. Brown rice can work but requires longer cooking and yields a chewier result.
Use oils with high smoke points such as avocado, grapeseed, or refined peanut oil. Butter adds flavor but burns below 150°C (300°F), making it unsuitable for high-heat crisping. A heavy-bottomed skillet-cast iron or carbon steel-is essential. These retain heat evenly and prevent hot spots that scorch the rice. Non-stick pans degrade under high heat and don't allow proper browning.
Tools: wooden spoon or spatula for stirring, fine-mesh strainer for rinsing rice, kitchen scale for precision. Avoid metal utensils-they scratch non-stick surfaces and can leave residue.
A fully crispy batch should produce a light crunch audible when bitten. If rice remains soft or sticky, it wasn't cooled enough or lacked sufficient oil. Overcooking causes acrid bitterness; undercooking leaves chewy centers.
Using freshly cooked rice is the most frequent error. Moisture prevents evaporation and traps steam, resulting in mush. Always cool rice in a thin layer on a tray before storing. Reheating rice in a microwave increases internal moisture-avoid this step entirely.
Stirring too early disrupts crust formation. Wait 30 seconds after adding rice to let the bottom layer bind. Use a wooden spatula to lift and flip rather than aggressively scraping.
Underestimating oil volume leads to uneven browning. One cup of rice requires at least 1.25 tbsp oil. Measure with a spoon-do not eyeball. For larger batches, increase oil proportionally.
| Mistake | Result | Fix |
|---|---|---|
| Using warm rice | Soggy, steamed texture | Cool rice 4+ hours before cooking |
| Too little oil | Sticking, uneven browning | Use 1.5 tbsp per cup rice |
| Low heat | Slow drying, rubbery outcome | Preheat pan to medium-high |
| Overstirring | Broken texture, clumping | Stir only after crust forms |
Crispy rice is central to Japanese okonomiyaki-a savory pancake layered with cabbage, sauce, and bonito flakes. The base is a batter of flour, egg, and dashi, poured over a bed of crispy rice. The contrast between soft, eggy pancake and crisp rice creates a signature mouthfeel.
In Korean cuisine, crispy rice appears in japchae, where it's added toward the end of stir-frying to absorb sauce and develop crunch. It's also used in banchan (side dishes), such as gochujang-glazed rice cakes.
Western chefs apply the technique to grain bowls. For example, a 2022 study in Journal of Culinary Science & Technology found that crisped rice increased perceived satisfaction by 43% in plant-based meal kits due to textural contrast (DOI:10.1080/15502786.2022.2054321). The study measured sensory feedback from 120 participants using standardized rating scales.
Crispy rice is often mistaken for fried rice. Fried rice uses stir-frying with vegetables, protein, and seasonings. It's meant to be eaten immediately and retains a moist, cohesive texture. Crispy rice is dry, fragmented, and served as-is or as a topping.
Another confusion arises with puffed rice. Puffed rice expands when heated rapidly in steam or pressure, creating hollow, airy pieces. It lacks structural integrity and collapses under weight. Crispy rice maintains rigidity and can support toppings like cheese or herbs.
A lesser-known distinction: some recipes call for "crispy" rice made in a toaster oven. This method fails because air circulation prevents consistent contact with fat. The result is dried-out, brittle fragments-not true crispness.
I tested this process during a weekend cooking session with friends. We prepared two batches-one with cold rice, one with warm. The cold batch developed a uniform golden crust within 4 minutes. The warm batch remained damp, stuck to the pan, and required constant scraping. After adjusting the timing and cooling method, we achieved crispness comparable to a Tokyo street vendor's version. The difference was unmistakable: one crunched cleanly, the other collapsed.
Always use room-temperature oil. Cold oil lowers pan temperature and delays browning. Let oil heat 30 seconds before adding rice. Use a timer-overcooking beyond 6 minutes causes burning. If the rice smokes, remove from heat immediately and wipe the pan.
For seasoning, add salt after cooking. Adding salt early draws out moisture and inhibits crust formation. A pinch of toasted sesame seeds or furikake enhances flavor without affecting texture.
When serving, place crispy rice on a warm plate to maintain heat. Cold plates cause rapid condensation, which softens the crust. Eat immediately-crispiness degrades within 10 minutes at room temperature.
Understanding how to make crispy rice enables deeper mastery of texture control in cooking. It's not just about crunch-it's about intentional transformation of a humble ingredient into something bold and satisfying. With the right rice, oil, and heat, anyone can replicate the results seen in professional kitchens.